
How to easily add a map to your CEWE PHOTOBOOK
Add an adventurous twist to your photo book with a map showcasing your globetrotting expeditions. When you add a map to your photo book, you can record where certain photos were taken, trace your route and mark the places that stole your heart.
Follow these simple steps to easily add a beautiful map of your travels to your photo book.
Add a map to your photo book
Once your selected photo book is open within the CEWE Creator Software, click on the “New Map” icon in the toolbar.
A map will automatically appear on the page. A menu on the right-hand side of the screen will now have options to edit, arrange and decorate your map.
Plot your locations
To generate a map of your desired location, simply input an address, town, area or country into the text box labelled 'Pins' located on the right-hand Edit panel [1]. Once you've done that, select the '+' icon next to the name of the location you wish to include within the map [2]. Next, select the edit option within the location name under 'Your choice' [3].
Customise the look of your marked locations
If you searched for a region, county or city, your map can display the full scope of the region you searched for. Select 'Area' in the dropdown under 'PIN', indicated in the image below.
You can change the appearance of this marking using the settings under 'Configure Pin'. Modify the colour of the outline, adjust the line thickness and the fill colour.
Mark places you visited with pins
You can mark specific spots you have visited by using pins. You can either add default, plain pins or pins with photos.
To add a plain pin to your map, click on the 'Place pin in the middle' option, then click and drag it to move it around until it's in the perfect spot.

How to add pins with photos onto your map
Adding pins that feature photos is a creative way to mark on your map where certain photos were taken.
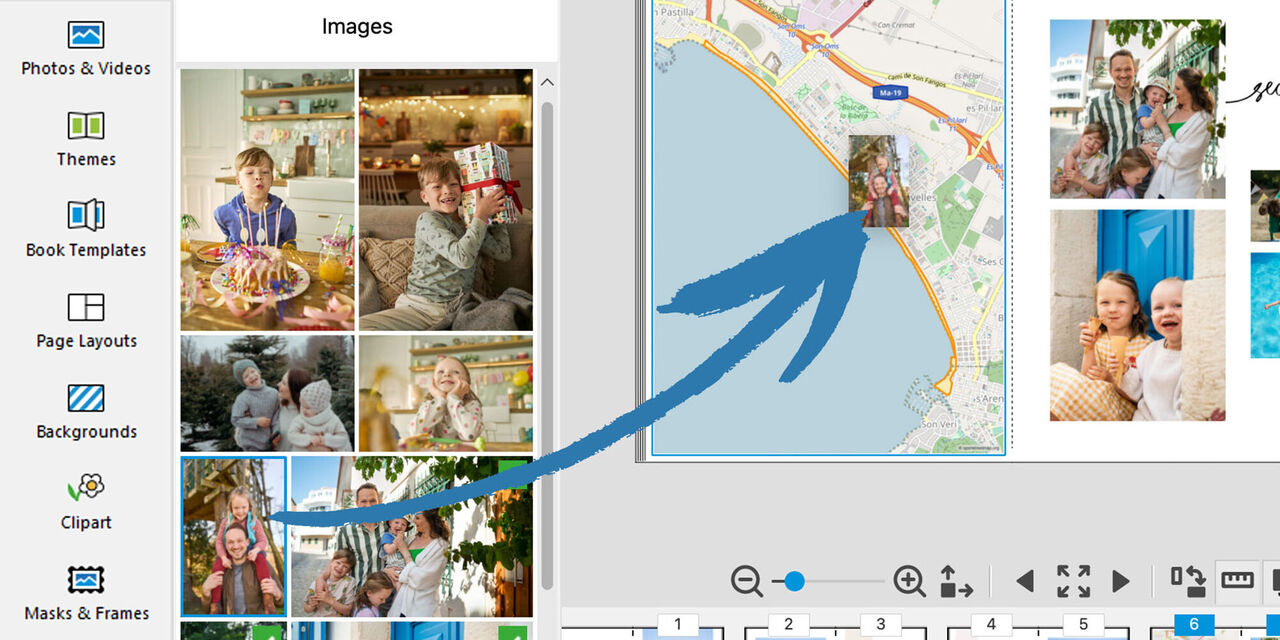
Choose a photo for your pin
Select the image you wish to include from the menu on the left-hand side of your screen where all your photos are stored.
Once you have chosen your image, drag it onto the map.
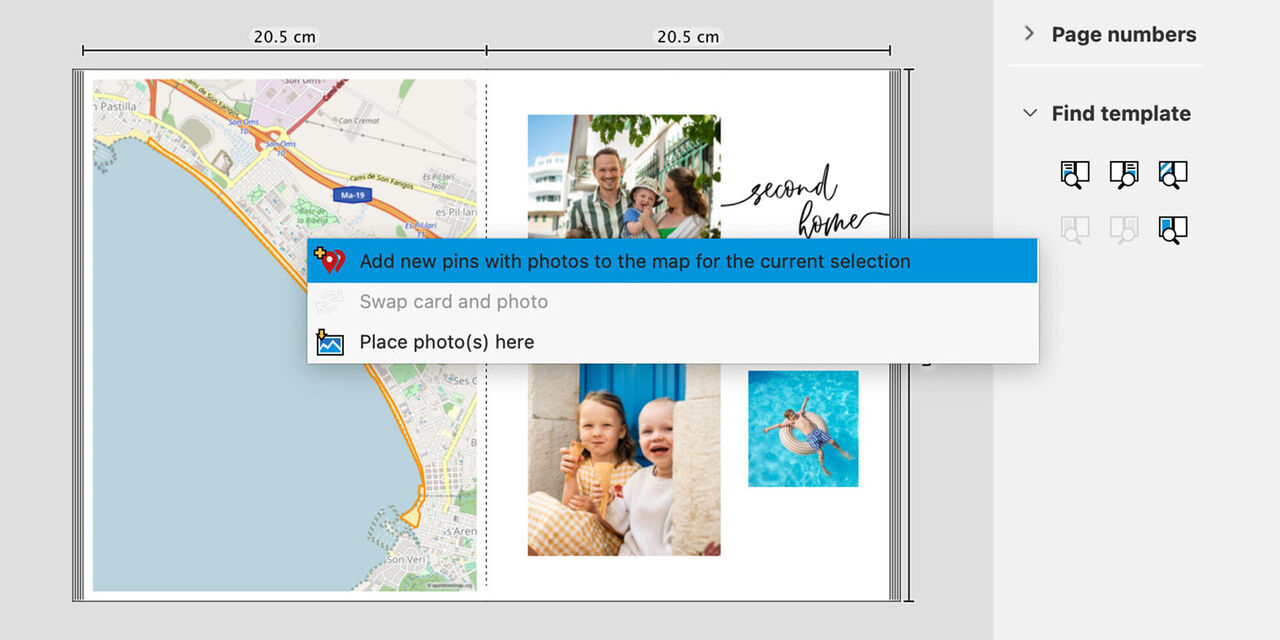
Combine your photo with the pin illustration
A pop-up message will appear. Choose the first option in the list - 'Add new pins with photos to the map from the current selection'.
This will add your chosen photo to the pin. It will be created for you automatically, with the chosen photo inside.
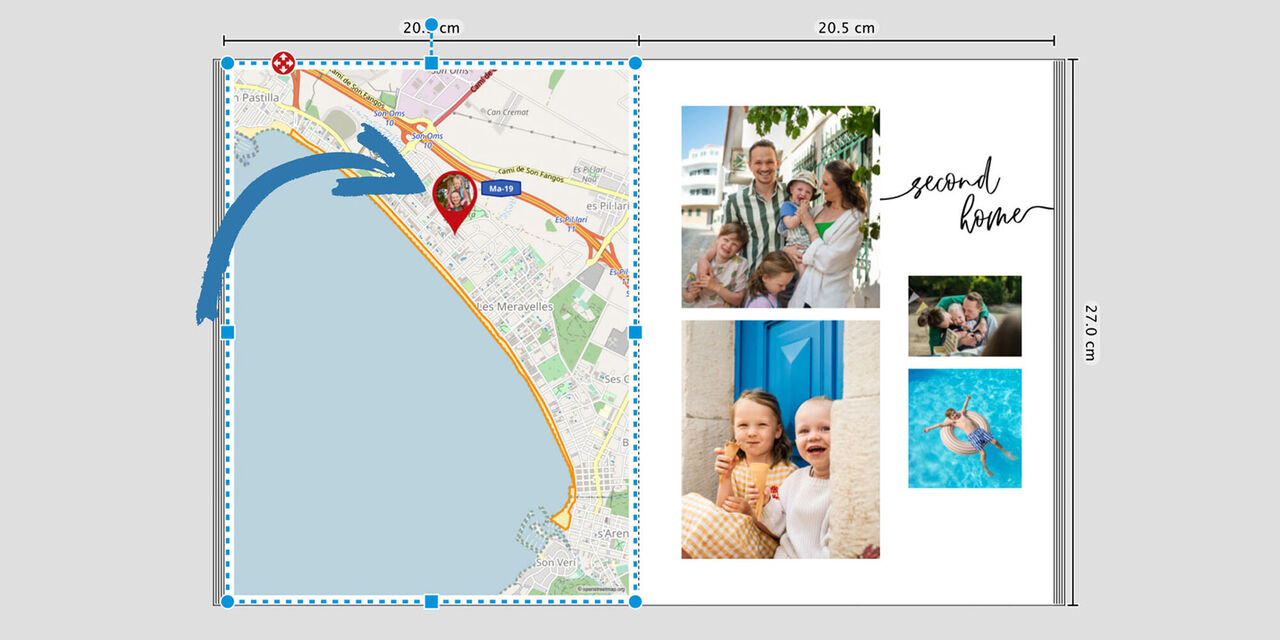
Place your pin on your map
Simply drag and place the pin at your desired location. You can place a pin anywhere on your map.
You can use this to mark the exact location that each of the pictures in your photo book were taken. It's a great way to tell the story of your travels and which route you took to get to each landmark.
More options to personalise your map
Edit the terrain of your map
Transform your map to fit the overall design of your photo book by selecting from four different terrain options. Open the 'Edit map' drop-down menu and choose from Hi-res, Typography, Bright, or Black and White. Each option will give your map a unique look that will enhance the overall aesthetic of your photo book.
If you want to get a closer look at the area on the map that you visited, you can use the zoom function to zoom in and out. Additionally, moving the map around within its placeholder is a breeze – simply click and hold the image and drag it until it shows your desired area.
Crop your map to size
Use the cropping slider bar to crop out the the area of your specific location. This is a great way to ensure that the focus of your map is exactly where you need it to be, with no distractions. It is especially effective if you want to isolate a particular country or island.
If you'd like to add some padding around the cropped selection, for example to include some of the sea surrounding an island, you can easily do so using the “Distance from cropping edge” function. Just specify the desired distance in millimetres and your design will be adjusted accordingly.

How to add flight routes to your map
Display your travel itinerary like a pro by adding all the flights you took onto your map. Documenting your flights is an excellent way to visualise your globetrotting journey and relive your travel experiences.
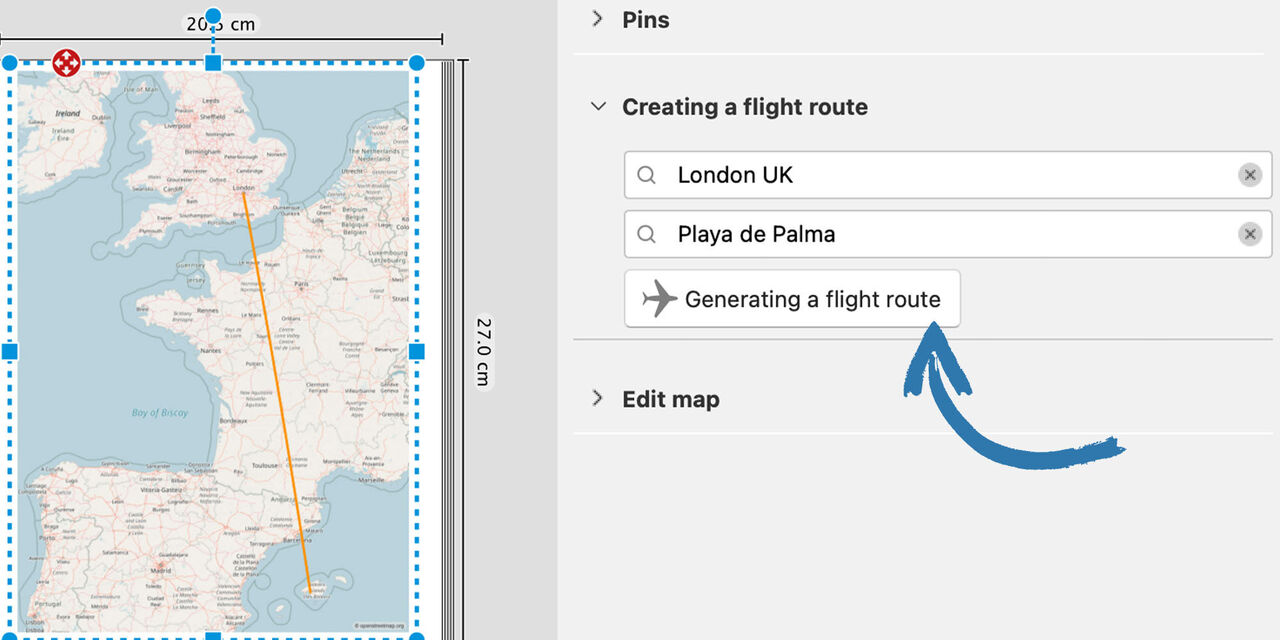
Plot your flight path
Click on your map and navigate to the 'Edit' menu on the right of your screen. Find the heading that says "Creating a flight route'. To plot your flight path, simply input your departure and destination locations, and click on the 'Generate Flight Route' button. Your map will then display the route you followed during your journey.
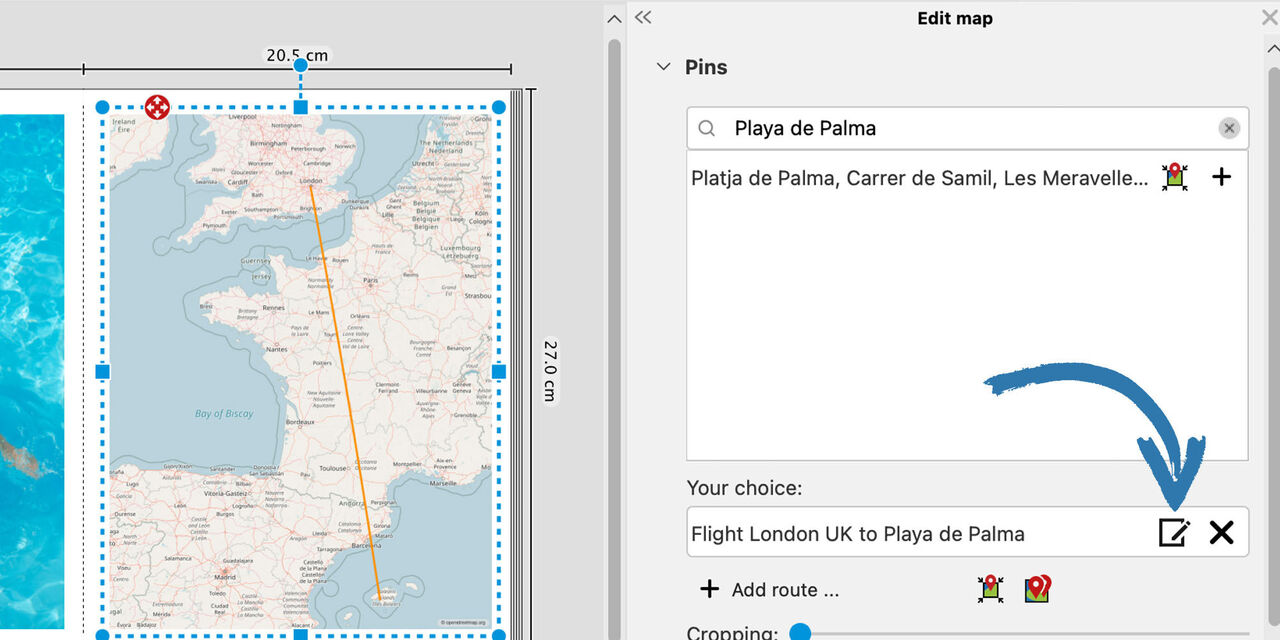
Edit your flight path
To enhance your flight itinerary, you have the option to customise and add pins to each of your routes.
Click on the 'Edit' icon next to the route you just added to your list.
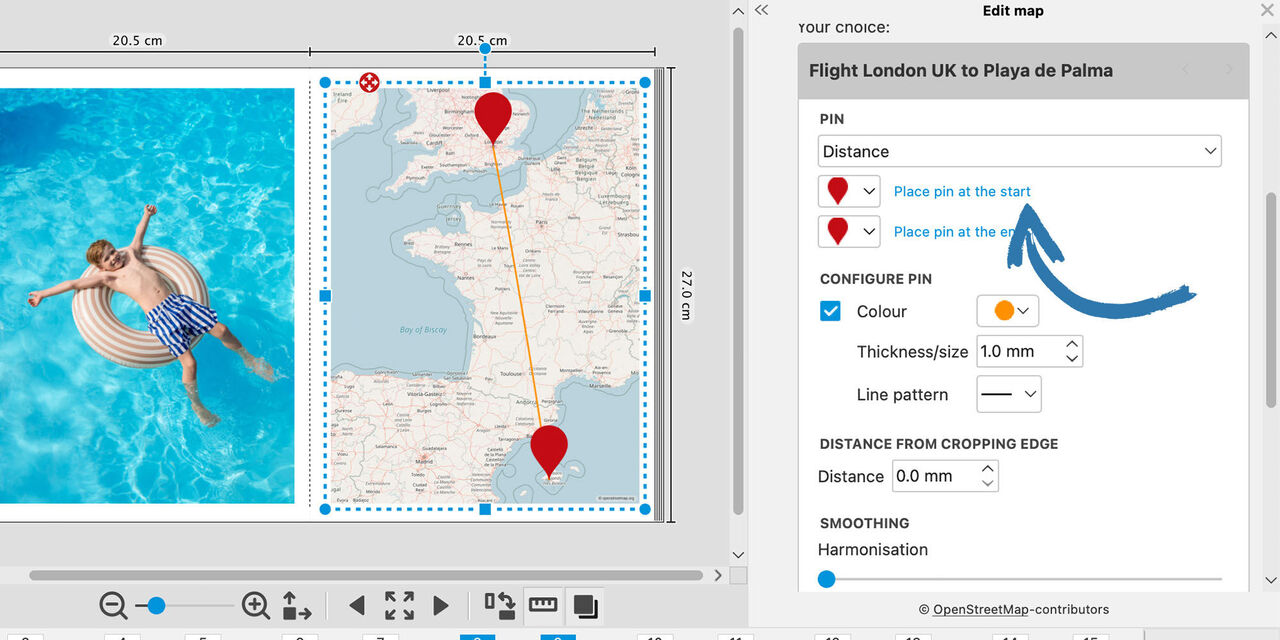
Add pins and customise
Choose the pin style you prefer, then, click 'Place pin at the start' and 'Place pin at the end' to add pins to the beginning and end of your route. You can also change the style and colour of the plotted route here.
Once you’ve finished, click on the tick icon located at the bottom right corner of the box to confirm your selection.
Creating a map with an accurate GPS route
The advantage of creating a GPS route is that it gives a more precise representation of the actual journey taken. It's useful for plotting hiking and outdoor routes, or displaying the route between two destinations with greater accuracy and detail.
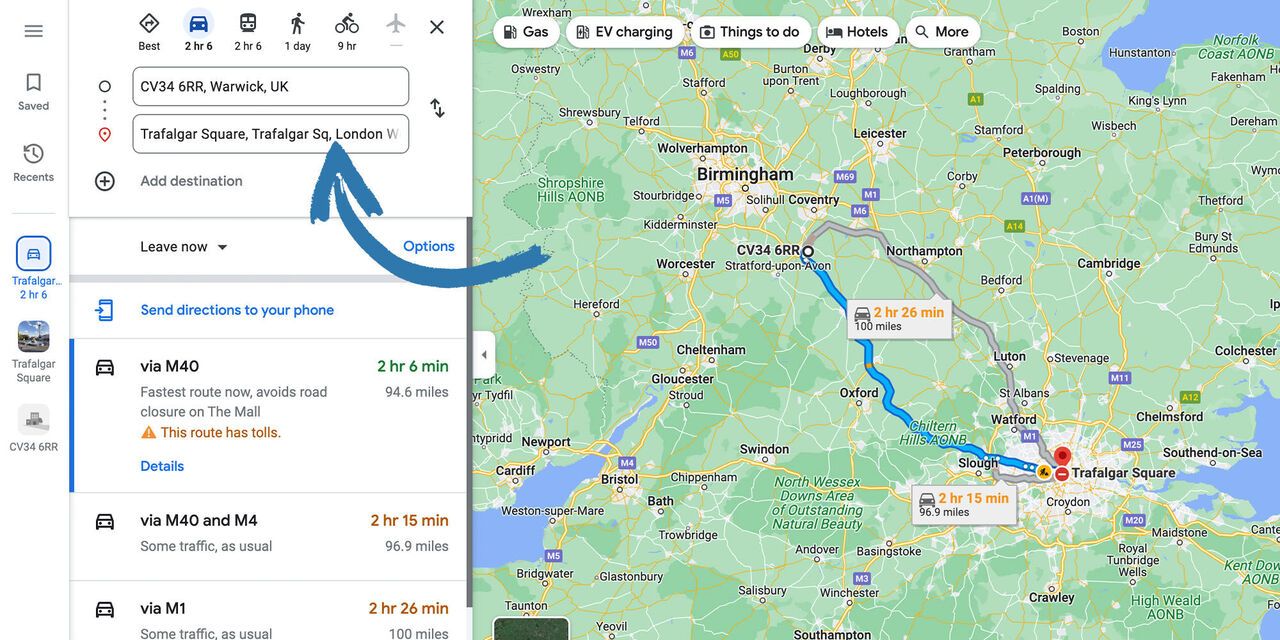
First, you will need to save your route as a GPX file. A GPX file is a great way to track your journey with the utmost precision. It’s packed with detailed geographical data to create a highly accurate route between locations, documenting your outdoor adventures. Generate a GPX file using Google Maps.
- Plot your itinerary using Google Maps.
- Select your start location and destination to generate route data. For modifications to the route preferences, click 'Options'.
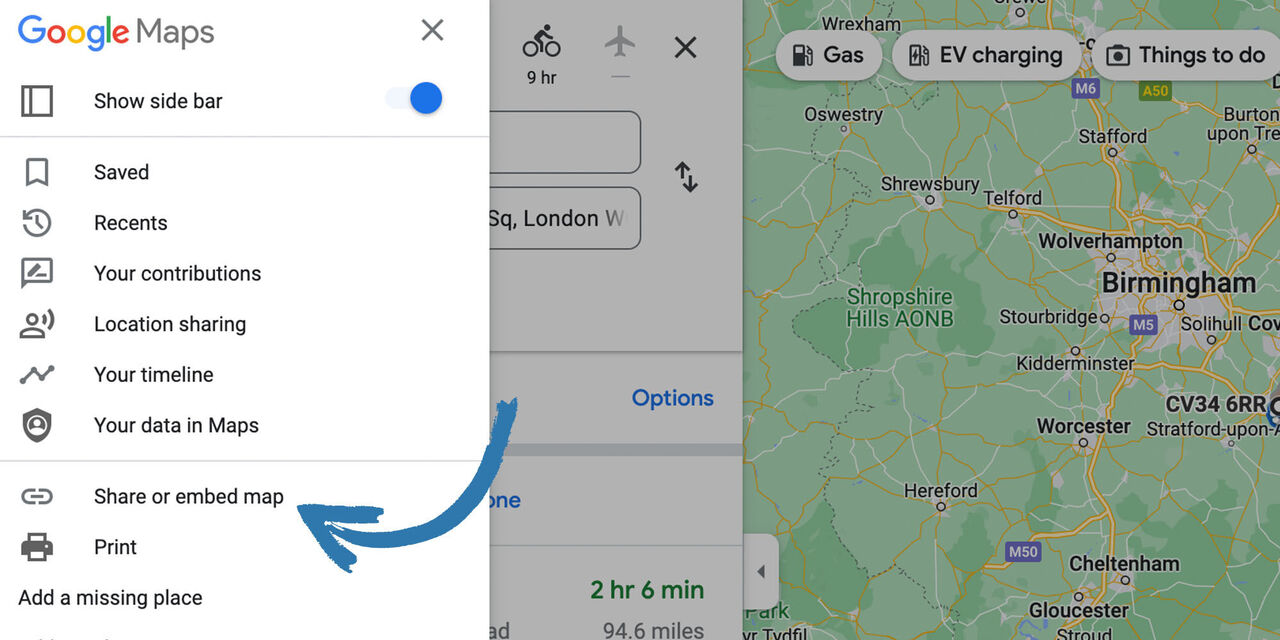
Next, select the hamburger menu located in upper-left corner, then click the option to share or embed the map.
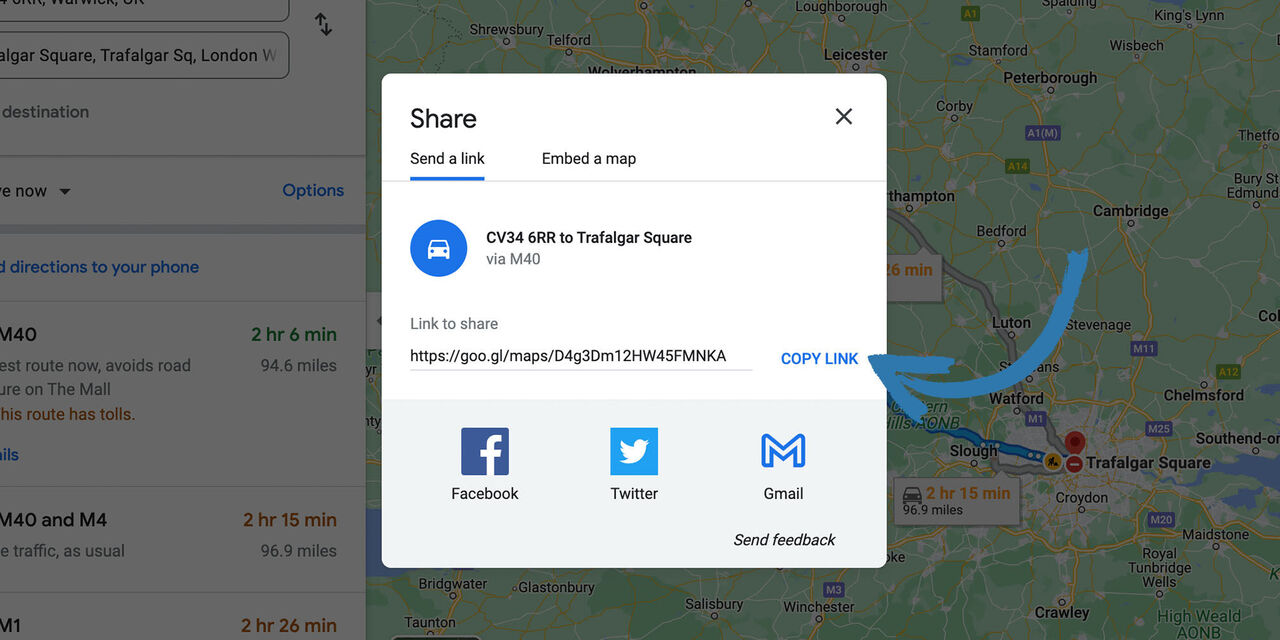
Your route data will have a URL created for it. Click 'copy link' to copy the URL of your route map to your clipboard.
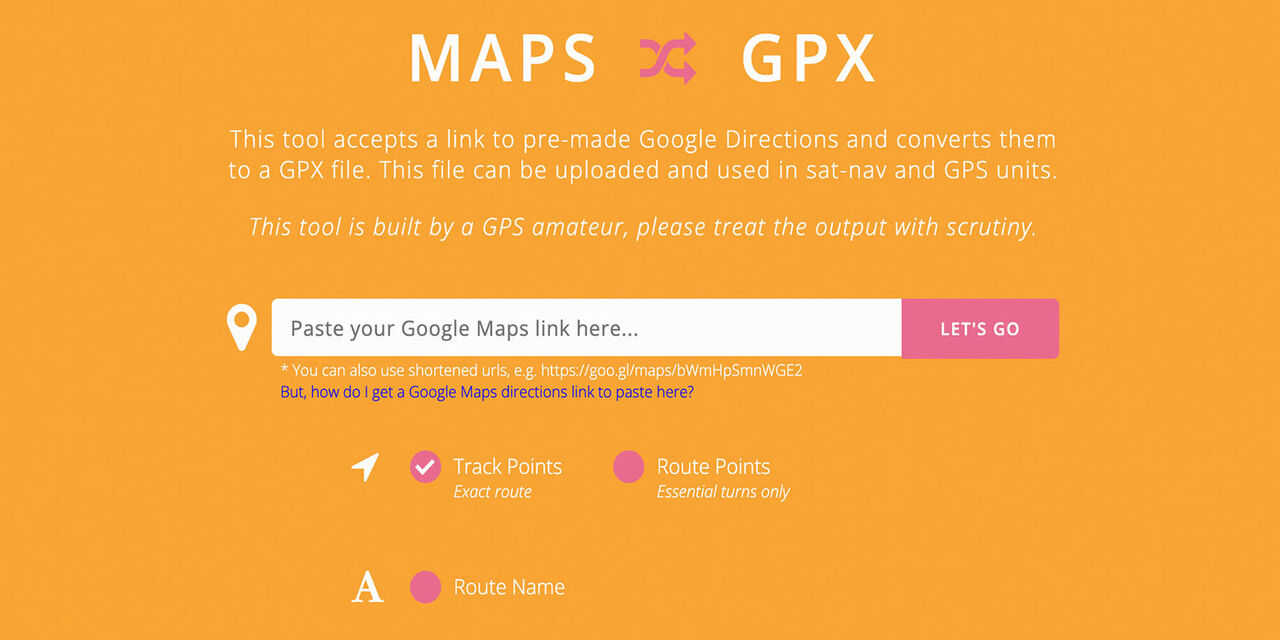
Next, go to the third-party website Maps to GPX and paste the URL into the text box and click the 'Let’s Go' button.
The Maps to GPX service will convert the URL into the GPX file and can be saved to your computer.
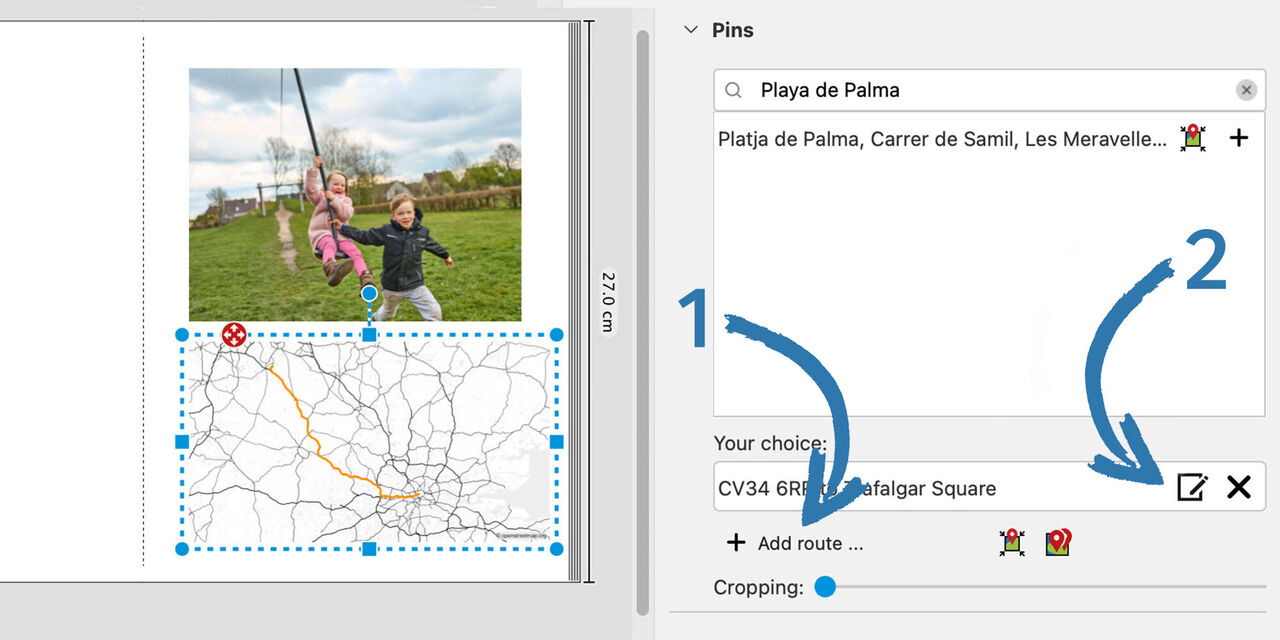
Go back to the CEWE Creator Software. Select the 'Add route' button on the right-side window [1] and locate the GPX file you have just saved on your computer. When you first open the map of your location, you'll see the entire country. To get a closer view of your route, you may need to zoom in. Customise the appearance of the marked route by clicking the Edit icon [2].


